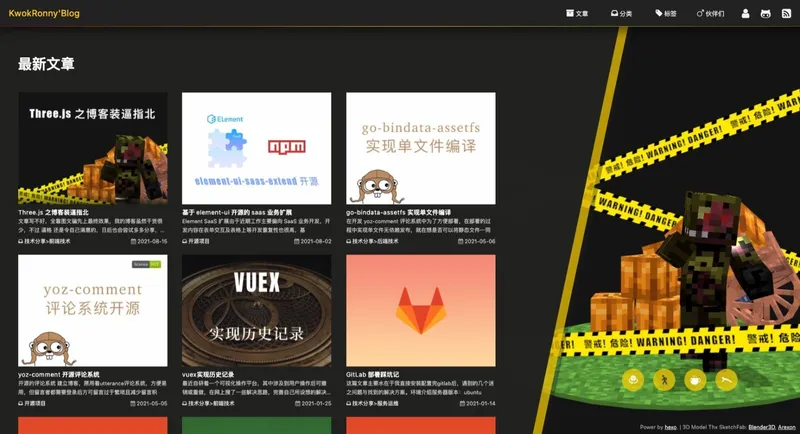
后端使用 Strapi 后,许多的操作都只用点点鼠标就可以完成,可以更快的进入到 Nuxt3 前端部分的开发,博客之前是用 Hexo 自己改的样式,现在也只需要将样式及布局迁移即可
创建项目+安装依赖
bash
复制成功
npx nuxi@latest init blog-by-nuxt
cd blog-by-nuxt

# 之前博客引用的样式依赖 stylus-shortcut 快捷样式
yarn add stylus stylus-loader -D
yarn add stylus-shortcut
# 安装 @nuxtjs/strapi 依赖,快速对接strapi REST API/Graph API
npx nuxi@latest module add strapi

yarn install
配置 Nuxt Config
样式直接复制,并将stylus-shortcut按vite方式配置,方便在组件内等各种使用,
javascript
复制成功
export default defineNuxtConfig({
  modules: [
    "@nuxtjs/strapi",
  ],
  strapi: {
    url: "/cms",
    prefix: "/api",
    version: "v4",
  },
	// ...
  app: {
    head: {
      title: "超能郭工",
      htmlAttrs: {
        lang: 'zh-CN'
      },
      meta: [
        { name: "viewport", content: "width=device-width,initial-scale=1" }
      ],
      link: [
        { rel: "apple-touch-icon", sizes: "180x180", href: "/apple-touch-icon.png" },
        { rel: "icon", type: "image/png", sizes: "32x32", href: "/favicon-32x32.png" },
        { rel: "icon", type: "image/png", sizes: "16x16", href: "/favicon-16x16.png" },
        { rel: "manifest", href: "/site.webmanifest" },
        { rel: "preconnect", href: "www.kwokronny.com" },
        { rel: "preconnect", href: "cdn.bootcdn.net" },
        { rel: "dns-prefetch", href: "www.kwokronny.com" },
        { rel: "dns-prefetch", href: "cdn.bootcdn.net" },
      ],
      script: [
        { async: true, src: "//hm.baidu.com/hm.js?1762b014e1a457fdc04e1ea7bc1026fa" }
      ]
    }
  },

  css: ["~/styles/index.styl"],
  vite: {
    css: {
      preprocessorOptions: {
        stylus: {
          additionalData: `@import "${path.join(
            __dirname,
            "styles/variable.styl"
          )}"; @import "stylus-shortcut/src/mixin.styl"`,
        },
        styl: {
          additionalData: `@import "${path.join(
            __dirname,
            "/styles/variable.styl"
          )}"; @import "stylus-shortcut/src/mixin.styl"`,
        },
      },
    },
  },
  // ...
})
配置 Strapi 代理
原计划 Nuxt3 在服务端直接请求 Strapi 接口进行渲染,但Strapi暴露的服务肯定是要走SSL的,Nuxt3 在服务端请求接口时会报无法验证证书
flowchart LR
A[Nuxt3服务器: example.com]-->S[Strapi: api.example.com]
A-->|渲染|F[Browser客户端]
F-->S
bash
复制成功
[14:09:44] [nuxt] [request error] [unhandled] [500] request to https://api.example.com failed, reason: unable to verify the first certificate (https://api.example.com)
  at processTicksAndRejections (node:internal/process/task_queues:96:5)
  at async $fetchRaw2 (./node_modules/ofetch/dist/shared/ofetch.d438bb6f.mjs:215:14)
  at async sendProxy (./node_modules/h3/dist/index.mjs:521:20)
  at async Object.handler (./node_modules/h3/dist/index.mjs:1284:19)
  at async Server.toNodeHandle (./node_modules/h3/dist/index.mjs:1359:7)
所以就干脆用 Nuxt3 直接代理 Strapi,接口直接向 Nuxt3 服务发起请求
javascript
复制成功
export default defineNuxtConfig({
  // ...
  nitro: {
    compressPublicAssets: true,
    routeRules: {
      "/cms/**": {
        proxy:
          process.env.NODE_ENV === "production"
            ? "http://blog-be/**" // docker host
            : "https://api.example/**",
      },
    },
  },
  // ...
})
flowchart LR
subgraph Docker
A[Nuxt3服务端]-->P[Proxy]
P-->|docker host 访问|S[Strapi]
end
A-->|渲染|F[Browser客户端]
F-->P
迁移布局
我们开始将布局迁移至nuxt3,创建布局文件layouts/default.vue,并将旧代码片段按照新组织的组件进行迁移。
html
复制成功
<!-- layouts/default.vue -->
<template>
	<div>
    <!-- components/layout/Header.vue -->
		<LayoutHeader />
		<div class="container-mask"></div>
		<ClientOnly>
    	<!-- components/layout/Minecreaft.vue -->
			<LayoutMinecreaft />
		</ClientOnly>
		<div class="container-wrap">
			<main class="main-container">
				<slot></slot>
			</main>
		</div>
    <!-- components/layout/Footer.vue -->
		<LayoutFooter />
    <!-- components/BackTop.vue -->
		<BackTop />
	</div>
</template>
<script lang="ts" setup>
</script>
html
复制成功
<!-- app.ts -->
<template>
  <NuxtLayout>
	  <NuxtPage />
  </NuxtLayout>
</template>
以上布局的迁移工作就基本完成了。
对接 Strapi REST API
创建composables/strapi.ts文件,给所有接口写为组合式API。
typescript
复制成功
import type {
  Strapi4RequestParams,
  Strapi4ResponseData,
  Strapi4ResponseMany,
} from "@nuxtjs/strapi";
import { Post, Category, Tag } from "~/types"

export const usePosts = async (params: Strapi4RequestParams = {}): Promise<Strapi4ResponseMany<Post>> => {
	const { find } = useStrapi<Post>()
	return await find("posts", Object.assign({
		populate: ["category", "tag"],
	}, params))
}

export const usePost = async (id: number, preview: boolean = false) => {
	const { findOne } = useStrapi<Post>()
	return await findOne("posts", id, {
		populate: ["category", "tags", "seo"],
		publicationState: preview ? 'preview' : 'live' //预览未发布的文章
	})
}

export const useCategories = async (id: number) => {
	const { findOne } = useStrapi<Category>()
	let categories = await find("categories")
	return categories
}

export const useTags = async () => {
	const { find } = useStrapi<Tag>()
	return await find("tags")
}
typescript
复制成功
// types/index.d.ts
//给自定义的方法内置声明
interface InjectFunction {
  $md: MarkdownIt;
  DateUtil: DateUtil;
  mediaUrl: (src: string, width?: number) => string;
  upsplashUrl: (src: string, width?: number) => string;
}

declare module "#app" {
  interface NuxtApp extends InjectFunction {}
}

declare module "vue" {
  interface NuxtApp extends InjectFunction {}
}

declare module "@vue/runtime-core" {
  interface NuxtApp extends InjectFunction {}
}

declare interface DataType {
	createdAt: string;
	updatedAt: string;
}

// 内容类型开启了 Draft&publish 功能将会多一个 publishedAt 属性
declare interface PublishedDataType extends DataType {
	publishedAt: string;
}


// 文章数据结构声明
declare interface Post extends PublishedDataType {
	title: string;
	unsplash: string;
	content: string;
  summary: string;
	category: Strapi4ResponseSingle<Category>;
	tags: Strapi4ResponseMany<Tag>
	top: number;
}

// 标签数据结构声明
declare interface Tag extends DataType  {
	name: string;
}

// 分类数据结构声明
declare interface Category extends PublishedDataType  {
	name: string;
}
创建components/PostList.vue文件实现文章展示页
html
复制成功
<!-- components/PostList.vue -->
<template>
	<div class="post-list row gutter-s spac-mh_gs">
    <div v-for="(item, idx) in  posts" :key="idx" class="post-item" :data-idx="idx"
      :class="props.postItemClass || `col-d-12 col-dm-8 col-6`">
      <NuxtLink :to="`/post/${item.id}`" :aria-label="item.attributes.title">
        <AspectRatio ratio="4/3">
          <img class="cover" style="object-fit: cover;" :src="upsplashUrl(data.attributes.unsplash, 600)"
            :alt="`Cover: ${item.attributes.title}`" />
        </AspectRatio>
      </NuxtLink>
      <div class="info">
        <NuxtLink :to="`/post/${item.id}/${item.attributes.title}`">
          <strong class="title">
            {{ item.attributes.title }}
          </strong>
        </NuxtLink>
        <div class="mark">
          <span>
            <Icon name="material-symbols:tag-rounded"></Icon>
            {{ item.attributes.category.data?.attributes.name || "未分类" }}
          </span>
          <span>
            <Icon class="spac-mr_n" name="material-symbols:calendar-month-sharp"></Icon>
            {{ dateUtil.now(item.attributes.createdAt) }}
          </span>
        </div>
      </div>
    </div>
	</div>
	<!-- 加载中提示 -->
	<div class="text-a_c spac-mt_s5" v-if="loading">
		<Icon name="svg-spinners:pulse-rings-multiple" size="50px"></Icon>
	</div>
	<div v-if="!props.top">
    <!-- 用于滚动加载的观察对象 -->
		<div class="load-observer" ref="LoadObserver"></div>
	  <!-- 数据为空提示 -->
		<InnerTip v-if="!posts.length && !loading" type="empty"></InnerTip>
  	<!-- 全部加载完成提示 -->
		<InnerTip v-if="loaded && posts.length > 0" type="loaded"></InnerTip>
	</div>
</template>
<script lang="ts" setup>
import { Strapi4RequestParams, Strapi4ResponseData } from '@nuxtjs/strapi/dist/runtime/types';
import { Post } from '~/types';

interface IProp {
	params?: Strapi4RequestParams // 自定义post请求参数
	top?: boolean, // 设置为展示推荐文章模式
	postItemClass?: string // 自定义postItem样式

}
const props = defineProps<IProp>()

const posts = ref<Strapi4ResponseData<Post>[]>([]);
const loading = ref(false);
const loaded = ref(false);
const page = ref(1);
const LoadObserver = ref(null);

useAsyncData(async () => {
	await loadNextPage();
})

onMounted(() => {
	if (LoadObserver.value) {
    // 观察者实现滚动加载
		const observer = new IntersectionObserver((entries) => !loaded.value && !loading.value && entries[0].isIntersecting && loadNextPage(), {
			rootMargin: '0px',
			threshold: 1.0
		})
		observer.observe(LoadObserver.value)
	}
})

async function loadNextPage() {
	if (loading.value || loaded.value) return;
	loading.value = true;
	let response = await usePosts(Object.assign(props.top ? {
		sort: ["top:desc", "createdAt:desc"],
		pagination: {
			limit: 4,
			start: 0
		}
	} : {
		sort: ["top:desc", "createdAt:desc"],
		pagination: {
			page: page.value,
			pageSize: 12,
		}
	}, props.params) || {})
	loading.value = false;
	if (!response.data.length) {
		loaded.value = true;
		return false;
	}
	posts.value = posts.value.concat(response.data)
	page.value += 1;
}
</script>
创建pages/index.vue 实现首页
html
复制成功
<template>
	<div class="index-page">
		<h2>最新文章 Latest Articles</h2>
		<PostList />
	</div>
</template>

各种相应的模块迁移并对接上就基本完成网站的迁移啦
🐳 部署
一如既往的使用 Docker + Drone CI的方式自动化部署,部署后再通过 Apisix 或 Nginx 配置路由和SSL,网站就基本部署完成啦
docker
复制成功
FROM node:18-alpine AS build
WORKDIR /src
COPY package.json /src
RUN yarn install
COPY . /src
RUN yarn build

FROM node:18-alpine
WORKDIR /app
COPY --from=build /src/.output /app
EXPOSE 3000
CMD ["node", "server/index.mjs"]
yaml
复制成功
kind: pipeline
type: docker
name: drone

trigger:
  branch:
    - master

steps:
  - name: build
    image: plugins/docker
    settings:
      registry: registry.cn-hangzhou.aliyuncs.com
      username:
        from_secret: ALIYUN_DOCKER_USR
      password:
        from_secret: ALIYUN_DOCKER_PWD
      auto_tag: true
      repo: registry.cn-hangzhou.aliyuncs.com/[镜像命名空间]/[镜像名]
      tags:
        - ${DRONE_BUILD_NUMBER}
        - latest

  - name: webhook
    image: plugins/webhook
    when:
      status:
        - success
    settings:
      urls: [webhook触发我的部署流程]
      headers:
        - "Authorization=Bearer rRj5XdqXDGRua9HTV6BS"


